10.30.2006

Lunchbox: Stuffed Acorn Squash

Let me start off by saying: I know you have to dig into these to eat them, and tear off the skin to get to the squash, and in doing so it completely destroys the ready-made bowl such to the point that I might as well have diced the squash and made it simpler. But. I could not help myself.
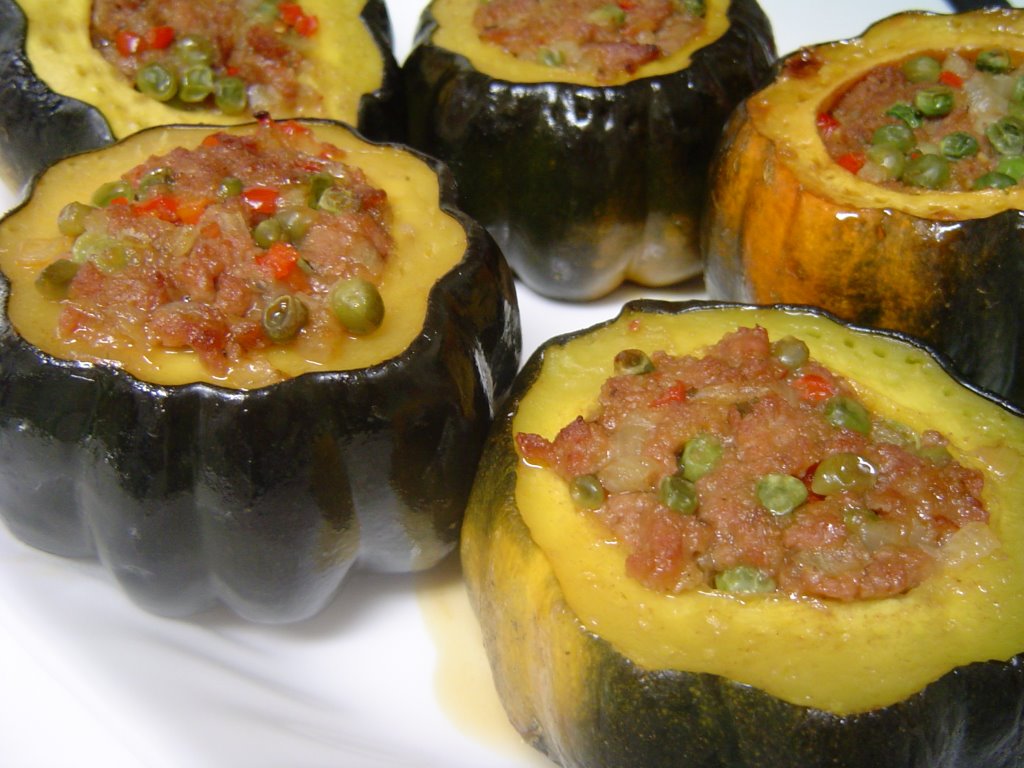
Acorn squash are just too cute.
For starters, they really do look like ginormous acorns, except for the whole green and streaked-orange coloring, and in that they are squash. And second . . . like a lot of vegetables, you can scoop out the interiors and have a wonderful little vessel to stuff. There is something about these individual portions, self-contained, that makes me happy, and as culinarily cutesy as it may be, it makes opening up my Tupperware at lunch that much cooler. I am such a dork.
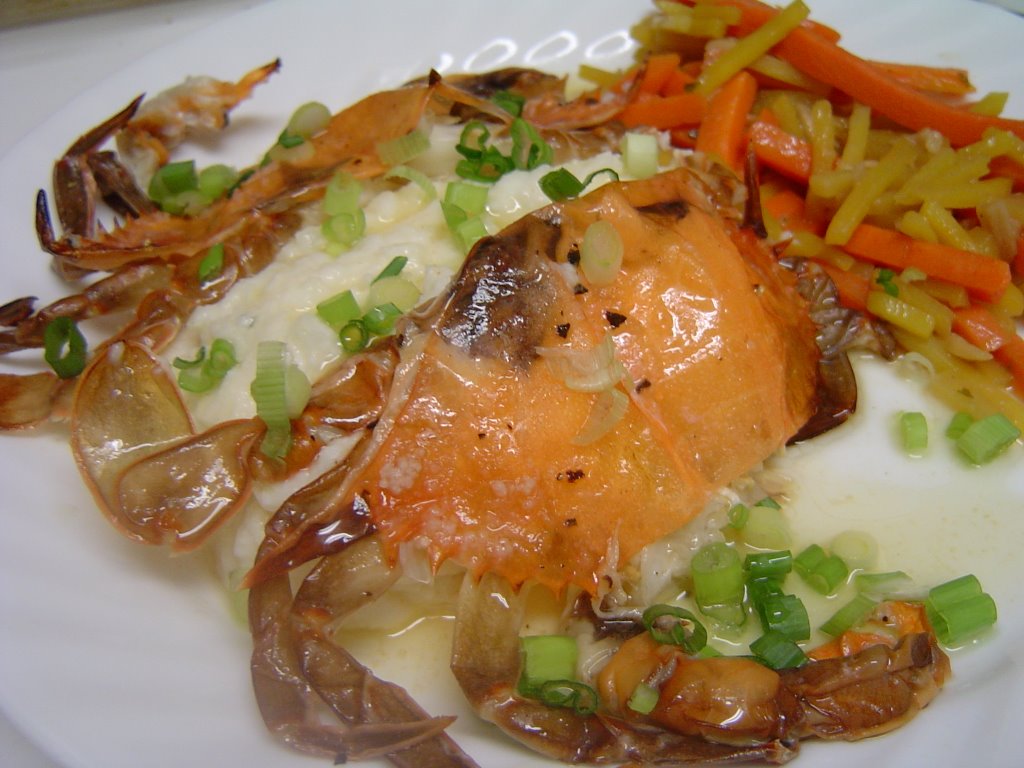
I love winter squashes, and the acorn squash here gets made into a meal in itself by the addition of a stuffing. I made some changes (using leaner sausage and cooking it prior to stuffing drains off some fat, and adding some extra veg and cutting out some breadcrumb) to make at least a nod to a more healthful effort. Squash itself is already a pretty excellent vegetable, being low-ish in calories, high in fiber and vitamin-filled with things like zeaxanthin, which as it turns out is not a made-up word. The glaze for the squash is made a bit better by replacing half the sugary liquid with broth and given more interest with some balsamic vinegar (imho, balsamic is good on just about anything, but it’s so good on squash). My only thing here is next time I might probably reduce the sugar part further and up the vinegar, as I’m particularly fond of the flavor, but as it stands it’s not really sweet. Portion-wise divided it’s about 3 oz or 1 serving of protein from the sausage, and I don’t pay attention to vegetables except if I’m not eating any.
As I noted, it is rather fussy to take apart at first, but the squash bakes so tender you can scrape it off the skin with a fork. And the stuffing . . . oh gosh, I was convinced I was going to eat it all before I got around to putting it in the hollows! It’s a little bit spicy, a little bit moist, and goes very well with the squash. Success.

STUFFED ACORN SQUASH
adapted from Bon Appetit, November 1996

5 acorn squash, each about 4-5 inches in diameter
1/3 c brown sugar corn syrup (maple syrup or molasses would work, but it was open from pecan pie)
1/3 c reduced sodium/fat free beef broth
1 Tbsp balsamic vinegar

1 lb lean spicy turkey sausage
1/2 c diced red bell pepper
1 small onion, diced
1 c frozen small peas
grinding black pepper
1/4 tsp salt
1/2 c dry breadcrumbs

Preheat oven to 400 F. Take the squash and carefully with a serrated knife cut off the tops and bottoms of the squash. Scoop out the seeds and stringy flesh in the interior so you have a hollowed-out squash shell; discard innards. Place squash in a foil-lined roasting pan. Mix together the corn syrup, broth and balsamic and brush about half of the mixture on the interior sides and the tops of each squash bowl. Place the squashes in oven and bake for about 30 minutes.
Meanwhile, in a skillet over medium-high heat break up the turkey sausage and let cook until just about done. Drain, reserving the drippings in the skillet, and remove to a large mixing bowl. In the same skillet cook the red pepper, onion, and peas in the drippings about 3-4 minutes or until tender. Add to the bowl with the sausage.
To the sausage mixture add a good grinding of black pepper and the salt. Spoon in 4 Tbsp of the broth/syrup/vinegar and sprinkle in the breadcrumbs. Mix together gently, but breaking up the larger pieces of sausage as you go, until you've reached a moist filling that compacts easily.
Once you can start piercing parts of the squash easily with a fork, remove the pan from the oven but keep it at 400. Brush the interiors of the squash again with the syrup mix. Divide the turkey sausage mix among the squash hollows (at least 2/3 of a cup; a larger squash may hold more), pressing the mixture in to fill the inside. Brush the tops of the squash and filling again with the syrup mix and return pan to the oven.
Bake until squashes are fork-tender . . . if the filling begins to brown, crimp some foil over the pan but continue baking until squash is done.

10.29.2006

Elegant Eating, For One

With Rob still in Italy and the girls working or otherwise away, this weekend I found myself with the very rare occurrence of having no places to go or people to see. So instead of sulking, I opted to take Saturday night as the opportunity to have some quality 'me time' - or, if you will, I had a date with myself.

Dating yourself is quite possibly the most satisfying way to date. You know from the start that you're building a relationship that will last. You don't have to worry about infidelity. You always get to choose the restaurant, and you never have to pretend you're in the mood to see Baywatch or anything else.
~ Cameron Tuttle, The Bad Girl's Guide to Getting What You Want.


I cleaned the apartment, chilled some white wine, lit a candle, and settled in for the night with a cozy blanket and the classic film noir Double Indemnity. And I made myself an absolutely delicious, even decadent, dinner for one.

ROASTED SOFT-SHELL CRABS WITH BUERRE NOISETTE
adapted from the all-new Joy of Cooking

two soft-shell crabs, fresh or thawed if frozen
(optional: buttermilk and Old Bay seasoning)
2 tsp grapeseed oil
salt and pepper
2 Tbsp unsalted butter
1/2 tsp orange muscat champagne vinegar (or white wine vinegar, or lemon juice)
1-2 scallions, finely chopped

Optional step: Particularly if they've been frozen, as these were for quite some time, I like to soak the crabs in seasoned buttermilk or milk to cover for at least an hour - I think it adds a bit of flavor in sweetening them and eliminates any fishy or other smells they might have from the freezer. Clean the crabs before soaking.
Otherwise . . .
clean the crabs and carefully pat dry. Line a small baking pan with foil, shiny side down, and preheat the oven to 500 F. Lightly brush the crabs on both side with the grapeseed oil and sprinkle with salt and pepper. Place on the prepared pan, shell-side up, in the preheated oven and roast for 4-6 minutes or until the shells have turned color and are crisp.
Meanwhile, make the buerre noisette: in a small skillet or saucepan melt the butter over medium-low heat. Shake the pan from time to time to swirl the butter about as it cooks. Be particularly careful as it foams not to let it burn. Let it cook until it smells toasted nutty and is colored a light brown. Immediately transfer to a small measuring cup or bowl and whisk in the vinegar and some salt and pepper to taste.
Pour the brown butter sauce over the hot crabs and sprinkle with scallions.
The quantities for both crabs and butter sauce can be easily multiplied; however, the cooking time for the crabs remains the same.

10.26.2006

Buttermilk, and Thursday night baking

Buttermilk always seems to linger in my fridge - I've heard it stays good for quite some time, so I'm not all that worried, but even so I wanted to find something more for it than just pie crust. And I am easily swayed by vanilla, which is so much more than the plain-jane the name can connote.
This cornbread scores points for ease, quick assembly, and no weird substitutions or trips to the grocery store to make. There's something about it though that keeps me from being overly enthused . . . I've certainly had sweeter cornbreads, so it's not that. It's just rather moist, and I think I'm used to a bit drier cornbread. Mine also has a very smooth texture due to using fine cornmeal, but it gives it a very nice crumb. It does also have an excellent crust, with a bit of crunch on the bottom and around the sides, and the top is firmer. I'm thinking sliced and toasted might be the way to go.
Overall though, I love the vanilla scent and the idea of using vanilla for a savory pairing. Recent googling has come up with a beautiful and informative listing of make-your-own vanilla _____ at Confessions of a Cardamom Addict, and I know I'm going to be referring to it often - vanilla oil and vanilla salt have me highly intrigued.

LA BETH'S VANILLA CORNBREAD
from Vanilla.com by way of the Food Network

1 c yellow cornmeal
1 c all-purpose flour
3/4 c powdered sugar
1/2 tsp salt
1/2 tsp baking powder
1/2 tsp baking soda
1 1/4 c buttermilk
2 large eggs
1 Tbsp vanilla
6 Tbsp unsalted butter, melted

Preheat oven to 350 F.
In a large bowl, whisk together the cornmeal, flour, sugar, salt, and baking powder and soda.
In a small bowl, whisk together the buttermilk, eggs and vanilla. Add to the dry ingredients. Pour the melted butter over the top of the batter. Stir just until all ingredients are moistened and thoroughly blended.
Pour the batter in a greased 8x8 Pyrex baking dish.
Bake in the 350 oven 40-45 minutes, or until golden around the edges and a tester in the center comes out clean. Let stand 15 minutes before cutting.

Lunchbox: Pumpkin and Sage Risotto

After three days, I'd had it with larb. Maybe I made it incorrectly, maybe bamboo shoots were just way too out there, but for whatever reason the recipe just didn't do it for me.
So I stared at the pantry and was thankful for the random collection of fun stuff it yields. Seeing as how I'd even forgotten the jar of pumpkin pesto was in there, now seemed a good a time as any to use it up.
Nowhere near as healthful as the previous effort for the week, but a darn sight tastier.

apologies . . . tupperware isn't very photogenic.
PUMPKIN AND SAGE RISOTTO
adapted from the bottom of the Bella Cucina jar

4 c low sodium/reduced fat chicken broth
2 Tbsp truffle oil
1 small onion, finely chopped
1 Tbsp minced garlic
2 tsp rubbed sage
1 c Aborio rice
1/2 c white wine
1 6-oz jar pumpkin pesto (pumpkin puree should also work; just up and adjust your seasonings)
1/4 c grated Parmesan and Asiago blend
1 Tbsp cream cheese

In a saucepan, heat the chicken broth over medium heat and bring to a simmer. Adjust to keep warm.
In a separate saucepan, heat the oil over medium heat. Add the onion, garlic and sage and saute about five minutes until onion is softening. Add the rice and stir for two minutes.
Add the white wine to the rice saucepan and stir until the wine is absorbed. Add the chicken broth, 1 cup at a time, stirring after each addition until liquid is absorbed and rice is tender, about 20 minutes.
Remove from heat and fold in the pumpkin pesto. Add the cheese and cream cheese and stir well until cream cheese is melted into the rice.
I'll probably take some roasted pumpkin seeds to sprinkle over the top.

10.25.2006

Let There Be Quiche

For someone who doesn’t like eggs, I feel like I’ve been eating an awful lot of them as of late.
This creation evolved itself from a request to find a good quiche recipe. I’d started off simple, classic, with the idea of a quiche Lorraine in mind. It was the picture that sold me – halo of golden crust, pale golden quivery top crusted with bits of browned melted butter – and it seemed so convenient. I cannot think of this as a leftovers meal, but ostensibly it was a really good way to clean out the fridge: half a pie crust from last week, stray strips of bacon, and eggs left in the massive carton I’d purchased. But soon enough in too went the remains of the Fontiago (TJ’s cross of fontina and asiago), and the cream and whole milk were shunned for the 2% already in there. By the time I’d picked up extra scallion and tomato at the store, Lorraine had long since made her exit.

The miniature pie pans are an indulgence to be sure, and anytime I make anything in cute individual portions I cannot help thinking of Bridget Jones, who on one of her more intrepid streaks contemplates fulfillment by volunteering in a soup kitchen, but wishes to make as her friend Tom suggests, darling mini-bruschettas with pesto. I am completely helpless at the sight of darling mini-just about anything, and somehow having made four smaller versions makes me feel so much more accomplished and elegant than one larger one. Completely ridiculous, but there you are.
I am also extremely pleased to note that the quiches have restored my faith in the buttermilk pie crust recipe. The dough is an absolute dream to work with, rolling out easily and not a single tear on draping it in each pan, and now I know can be used for either savory or sweet fillings without adaptation. I pre-baked them slightly and finished them off filled on a baking sheet for easy transfer. The crust came out golden, buttery, rich and tender, and was just crisp enough to keep its shape out of the pan and provide a contrast for the creamy egg mixture – the whole thing will literally melt in your mouth. Forgive me for my effusiveness – this is phenomenal.

DARLING MINI-QUICHES
adapted from Quiche Lorraine in Essentials of Baking


1/2 recipe (1 crust)
Buttermilk Pie Crust Dough
4 slices thick-cut bacon

4 Tbsp shredded Fontiago or fontina cheese

2-3 large roma tomatoes, seeded and diced

5 scallions, thinly sliced

3 large eggs

1 - 1 1/2 c 2% milk

1/2 tsp salt

1/8 tsp white pepper

pinch nutmeg


Have the dough divided into fourths. Roll each fourth into a slightly-larger-than six-inch circle and gently drape into a 3-inch miniature nonstick pie pan. Fold over the edges around the rim of the pan and crimp with a fork. Prick the interior and sides of the crust with a fork. Repeat to form four crusts. Refrigerate for at least 30 minutes.

Preheat an oven to 400 F. Place the pie pans on a baking sheet and place in the oven. Bake the crusts for 4-5 minutes. Remove the crusts from the oven and reduce oven temperature to 350 F.
Meanwhile, microwave (I hear it removes more of the carcinogens) on paper towels for 2 minutes on high at a time until crisp. In a large measuring cup, beat the eggs. Add milk to eggs, along with salt, pepper, and nutmeg, and whisk together well.

Crumble a slice of bacon and line the bottom of a crust with it. Over the bacon, sprinkle 1 Tbsp shredded cheese. Sprinkle over about a Tbsp of diced tomato and then a sprinkling of scallion. Pour some of the beaten egg mixture into the crust over the layers until the filling has just about reached the rim. Repeat with the remaining pie shells. (I had a bit of ingredients and egg leftover; poured into silicone molds and baked at 375 for about 30 minutes it made a delicious if slightly runny version of
Kalyn's Egg Muffins. If you use the lesser amount of milk, you should be able to divide the egg evenly between the four pans with no problems.)
Place the crusts on their baking sheet back in the oven at 350 F. Bake for 30 minutes, turning the pie pans during baking so that crusts brown evenly.

Leftover quiches may be reheated slowly in a 300 F oven for about 15-20 minutes.

10.22.2006

Lunchbox: Larb

countdown to psych GREs, 13 days; countdown until first due dates for applications, 62 days.

Sara chastised me last week for admitting that I was taking cold cuts for lunch. Granted, it was Healthy Choice, and I brought along carrot and celery sticks and a small peach and plum, but still, it's cold cuts, and that's pretty much unacceptable from where she stands. I do my best, but some weeks making an awesome lunch just doesn't happen. Once you start blogging, there's a lot of pressure to produce.
Sara keeps me in line.
So this week I pulled my act together and am getting back to making it from scratch. I've been somewhat enamored of Thai food as of late, having made a bastardized version of Thai barbecue turkey tenderloin (and I can't wait to try it with chicken thighs), complete with Thai cucumber salad, and a sort-of Thai coconut chicken soup all last weekend. In the midst, I've done a lot of browsing through the Thai cookbook and so this week I went with one of the dog-eared pages for something quick, easy, and remotely healthful.

I've never had larb before per se, although Pod does this absolutely amazing beef and chicken lettuce wraps with peanut sauce, which was why larb sounded good and sort of familiar. More interesting than your basic tortilla-based wrap or a sandwich, and bonus creativity points for sneaking in lettuce outside of a salad. The galangal may be a bit strong on first impact, but it's growing on me - I'd start with a bit less if you're not a big sour/ginger fan, as it does have a lingering piquancy. The bamboo shoots and water chestnuts were meant to be stretching vegetables - I was really looking for fresh bean sprouts, and on reflection julienned carrots I think would be super in here, but the veggies are an optional add-on anyhow so suit yourself.

LARB
adapted from Thai and from this egullet recipe

6 Tbsp low-fat/reduced sodium chicken broth
1 lb lean ground chicken
1 small onion, finely diced
1 8-oz can sliced water chestnuts
1 8-oz can sliced bamboo shoots
1/4 tsp or so white pepper
1/4 tsp or so garlic powder
1/4 tsp or so salt
3 kaffir lime leaves, very finely slivered
zest of 1 lemon (standing in for lemongrass)
4 scallions, finely sliced
1 tsp powdered galangal
1 Tbsp roasted rice powder
4 Tbsp fresh lemon juice
2 Tbsp lime juice
3 Tbsp fish sauce
about 15 Thai basil leaves, torn
butter/Boston lettuce

Heat the chicken broth in a large skillet over medium-low heat. Add the ground chicken and stir to moisten, breaking up with a spoon, and cook about 5 minutes. Add the onion and stir to combine; cook an additional 2 minutes. Add the water chestnuts and bamboo shoots, stir to combine, and cook for 1 minute.
Sprinkle over the white pepper, garlic powder, salt, kaffir lime leaves, lemon zest, and scallions. Toss gently to combine. Sprinkle over the galangal and rice powder and stir to combine well, dissolving any powder. Raise the heat to medium-high and add the lemon and lime juices and fish sauce. Stir well and cook, stirring, until sauce thickens and coats the chicken mixture. Add the torn basil leaves and stir to wilt.
Remove whole lettuce leaves and gently wash and dry (a salad spinner will work well for this). Pack whole leaves flat between paper towels in a container. Take the chicken mixture separately. Eat room temperature or warmed chicken mixture in the lettuce leaves.

10.19.2006

Practice Makes Pies: Part I, Paula Deen

Through a series of telephone calls and other events, it has finally transpired that I�m going to Rob's for Thanksgiving. Thanksgiving is a pretty big deal over there, with him and his brothers going back home, and in quite the opposite of my family where my father is the only male, his mother is the only female . . . except for me this year. I don't mind admitting I'm slightly nervous (and by nervous, I mean mildly terrified) at the prospect of making a good impression on The Boyfriend's Mother. Rob and I are on our second go-round of being a couple, nearing a year and doing infinitely better than we did several years ago, but I believe there are negative marks against me for that first time.
Because I'm basically intruding on what is otherwise a family affair, I wanted to bring something - a peace offering, if you will - some hostess gift, some little token of affection, something that shows you're thoughtful and you care and you appreciate being there. So in another series of telephone calls and other events, it was settled on pecan pie.
This is very good, because you cannot hold a grudge on people bearing pie. It's not right.
And then I started thinking. I have not ever made a pecan pie. I think actually it's been at least if not more than a year since I've made any kind of pie - I'm hoping it is rather like riding a bicycle, where you don't really forget. Pecan pie is The Boyfriend's Mother's favorite. Add to that the need to get out of the red and back into black, and I'm feeling some pressure: This has got to be one damn good pecan pie.
So Rob was, as it turns out, entirely kidding when he said I could practice making pies, but I was serious. Greatly inspired by Laura's recent success with apples - and noting that even a good baker comes across a recipe that in theory sounds great and just doesn't produce, I thought it made incredible amounts of sense to start baking pecan pies like no other in time to find one worthy.
I want to make a good, straight-forward, traditional pecan pie. I think pecans, I think South; I think South, I think Paula Deen. Paula, unfortunately, does not specify a crust recipe, leaving me to scramble on my own . . . but I figured buttermilk also sort of evokes Southern images (plus it sounds good) and therefore the two make an appropriate start. Paula specifically says unbaked pie crust, but being that at least two cookbooks I tend to respect (the new Joy and W-S’s Essentials of Baking) called for it to pre-bake and that made sense to me given that it’s more similar to a custard pie . . . I pre-baked it.
Oh, Paula. How wrong I was to doubt your guidance. I dutifully cut my tinfoil to cover the sides of the crust, put in my pie weights, and baked along with Joy’s directions. It’s way too long a time for something that goes back into the oven. I blame that, and not the crust - although the crust did shrink a little, I think this is due more to the pre-baking than the dough, which rolled out and transferred beautifully. I haven’t decided yet whether I’ll simply not pre-bake the next crust, or freeze and bake it for less time (Joy calls for refrigerating; Essentials for freezing for 30 min; both state for 400 F for at least 15 min and then additional time, though Essentials reduces the oven temp and Joy does not), or whether I want to give the buttermilk recipe another shot with one of those methods before moving to another crust. I think the crust has a lot of potential.
The pecan pie filling itself is ridiculous easy. I honestly had no real notion before this (with my mother’s nut allergy, we never had pecan pies, and so my exposure with them is limited to a fantastic Derby Pie down in Kentucky) of what exactly went into pecan pie, and the basic answer is less than five minutes’ effort to make a filling. Perhaps to make up for ignoring her on the crust, I followed the filling recipe exactly – this is something I don’t often do with recipes – even with the 2 Tbsp bourbon. I was a little hesitant after the first tablespoon, it has a very powerful odor, but I figured, to hell with it and dumped it in anyways.

I cannot explain to you how good this pie smells. Maybe all pecan pie smells this good; I'll let you know. It took an awful lot of restraint not to cut into it right away - and as you can see, it has a bald spot where I couldn't stop myself picking off a pecan. But I was good, in part because that wouldn't be very nice, and in part because due to travel issues the pie will need to be made at least a day and possibly two before, and I need to know how it will hold up.
First obliging taster was the lovely and gracious Mindy K., who oh-so-appropriately threw a redneck party this weekend, and happens to love pecan pie. We dug into slices round about one a.m. Saturday after several rounds of "All My Exes Live in Texas". The crust definitely was overbaked. Min's roommate Mallory kindly said that that was exactly what you needed, a bit of bitter in contrast to the sweet, but overall I think it can do better. The filling is quite good - not overpowering bourbony, as I thought it might be, and sweet but not cloying sweet. Fresh-baked out of the oven, or even the day of, I think I'd have no qualms in bringing it anywhere; that crunchy pecan off the top was just excellent! Paula's version will be in the running, but we've got a ways - and some more baking - before Thanksgiving.

PAULA DEEN'S BOURBON PECAN PIE
from Paula Deen via the Food Network

1 c sugar
3 Tbsp unsalted butter, melted
1/2 c dark corn syrup (I used Karo with brown sugar instead of the real dark stuff)
3 large eggs, beaten
2 c pecan halves
2 Tbsp good-quality bourbon
1/2 recipe (1 crust) Buttermilk Pie Crust Dough

Preheat the oven to 375 F.
In a medium bowl, stir together the sugar and melted butter. Add the corn syrup, eggs, pecans, and bourbon, and stir until all ingredients are combined. Pour mixture into the pie shell (Paula uses an unbaked shell and places the pie dish on a baking sheet). Bake for 10 minutes at 375. Lower the oven temperature to 350 and bake for an additional 25-30 minutes or until pie is set. Remove from oven and cool on a wire rack.

Buttermilk Pie Crust Dough


BUTTERMILK PIE CRUST DOUGH
adapted from Bon Appetit, November 1991

2 1/2 c all-purpose flour
2 Tbsp sugar
1 tsp salt
1/2 c (1 stick) unsalted butter
1/2 c shortening (I used Crisco's new trans-fat-free version)
1/2 c buttermilk, divided

Dice the butter and the shortening. Place in a bowl and freeze for 10 minutes.
Meanwhile, whisk together the flour, sugar, and salt.
Cut in the butter and shortening with a pastry cutter until the mixture resembles fine meal. Add six tablespoons of the buttermilk and mix together with a fork until moist clumps form. Continue adding the buttermilk, a little at a time, and mixing with the fork until the dough comes together.
Press together to form a dough ball. Divide dough into two. Gather the dough into separate balls and flatten or roll into a disk; I like a six-inch size. Wrap separately and chill at least 1 hour before using.
Makes 2 crusts; each enough for a single 9-inch pie.

To Those Who Wait

I’ve never been so good with being patient. As much as I don’t like saying it’s just not in my nature . . . it’s just not in my nature. Metaphorically speaking, I run the red lights, I jump the gates, and I read the last page first.
So I don’t know what possessed me to think braised beef – that’s not true, actually; it’s that Marcella Hazan makes things sound fantastically good, and taken in by the minimal ingredients and ridiculous ease of the recipe, I skip right over the step that says three and a half hours.
I’ll warn you right now: this is a pretty stupid thing to do. I ended up spending about half an hour on prep, and then having to ask Sara to hold on the phone every half hour as I turned the roast, and then having to defend myself when at 930 I had not yet eaten dinner why I wasn’t just going to make a pb&j and be done with it.
But my point, if I have one, is to butcher Phil Collins: You can’t hurry braised beef; no, you just have to wait. Perhaps not surprisingly, I caved when at 10pm I still hadn’t eaten and took the roast out. It was definitely done – the meat thermometer shot way up – but only the ends were that silky fork-tenderness that you want in a good pot roast. I shoved it in the refrigerator, left the dishes for the next day, and went to bed.

it is difficult to explain, when it photographs like that,
all medusa-looking with the onions
, why this is so utterly good you
should try it, but really, it just is.


I think the results could have been achieved if I’d just waited a tiny bit more for it to cook Tuesday, but letting it sit works just as well – and fools you into being patient. As if by magic, the middle slices of beef I’d thought looked tough that night have become tender, moist, and full of flavor - even when reheated in the microwave. I can't
actually vouch for how it tastes the first night it's made since I gave up, but I can assure you it's delicious a day or so after.
This dish goes fantastically with oven-roasted sweet potatoes. My major note is that this is probably much better started on a weekend afternoon than a weekday evening.

BEEF ROAST BRAISED WITH ONIONS
adapted from Marcella Hazan's Essentials of Classic Italian Cooking

~ 1/4 lb reduced sodium hardwood smoked bacon
3 1/2 lbs boneless beef roast (such as round rump)
5 medium onions sliced thinly
salt and black pepper

Preheat the oven to 325 F.
Cut the bacon into narrow strips about 1/4 inch wide. Use half the strips to lard the meat: assuming you don't have a larding needle (I certainly don't) insert a thin, long knife along the grain of the meat to make a puncture. Using a hard chopstick, or your fingers if you get desperate, push the slice of bacon into the meat.
Choose a large Dutch oven or other ovenproof pot. Spread the sliced onions on the bottom of the pot (don't panic if it looks like you won't have any room left) and distribute the remaining strips of bacon over the onions.
Season the beef roast well with salt and pepper and nestle on top of the bacon-covered onions. Cover the pot tightly - if the lid does not provide a tight fit, place a sheet of aluminum foil between it and the pot and crimp down a bit to cover. Put on the uppermost rack of the preheated oven.
Cook for about three and a half hours, until the meat feels tender when prodded with a fork -- alternatively, cook the meat for two to two and a half hours, get frustrated because you're hungry already, eat a breadstick and put the roast in the refrigerator for the next day. I swear it's magic. Turn the roast after the first 30 minutes, and every 30 to 40 minutes thereafter.
When done, remove and slice the meat. Drain some fat from the pan with a turkey baster. Pour the remaining contents of pan juices, drippings, and onions over the meat and serve warm.
To reheat: take slices of the meat, either left whole or peeled along the grain with your fingers into strips, cover with onions, and microwave for two minutes or so on high.

10.16.2006

Chicken Soup for the Sinuses

Last week, I felt like poop. A sinus headache for nearly a whole week left me drained, exhausted, and extremely congested. Come the weekend, all I wanted to do was lie on the couch curled up in a ball and sleep. I watched a few movies with Rob, made some cocoa (from scratch - oh my gosh, I had no idea it was so good), and most importantly, made soup. It just seems right.
This recipe comes from the simply titled Thai by Judy Bastyra, which I believe my parents picked up for me in a Costco. At first I couldn't find too much in it, but after several porings over I realized I have nearly every other page dog-eared and I've turned to their ingredients section for spice information - it's been quite a find. The galangal, chicken and coconut soup I had been hoping would be similar to Lemongrass's, which I get every time I go there with Sheila from work. It's not quite the same flavors - the restaurant's is a bit milder, but with our added hot pepper and garlic this had a more spicy-sour note that was perfect for giving me back a sense of smell. Delicious, nutritious, and a powerhouse.

GALANGAL, CHICKEN AND COCONUT SOUP
adapted from Thai

1 Tbsp dried lemon grass
zest of 1 lemon
1 medium onion, peeled and quartered
4 garlic cloves, peeled and quartered
2 dried Thai chiles
2 14-oz cans coconut milk
2 cups chicken broth

3/4 - 1 tsp galanga/galangal powder
black pepper
5 kaffir lime leaves, torn
4 boneless skinless chicken tenderloins
1 can cut baby corn cobs
6-8 oz. frozen haricot verts/thin green beans
4 Tbsp fresh lemon or lime juice
3 Tbsp Thai fish sauce
about 12 Thai basil leaves

In a large pot, toss in the dried lemon grass, zest, onion, and garlic. Carefully split the chiles and shake over the pot so the seeds are loose. Add the coconut milk and chicken broth. Grind over a good quantity of black pepper, and stir in with the galanga powder and kaffir lime leaves. Set the pot over medium heat and bring to a boil. Reduce the heat to low and simmer gently for 15 minutes or so, stirring occasionally (don't be tempted to heat it on high; coconut milk foams up very quickly).
While the soup is simmering, cut the chicken into thin strips.
Strain the soup into a clean pot and return it to a low heat. Let it come back to a near simmer. Stir in the chicken strips, corn cobs and haricot verts. Simmer gently, stirring occasionally, for 5-7 minutes or until the chicken is cooked.
Stir in the lemon or lime juice and fish sauce. Tear up the basil leaves and add to the soup. Stir for one minute and then remove from heat. Serve warm.

Note:
You're not likely to find all the ingredients in your regular supermarket unless it's truly awesome or an Asian market, but I've had good luck with importfoods.com and next order will be getting my lemongrass in from them - in the absence of fresh, zest a lemon. I also skipped with powdered galanga for fresh, but if you don't have either of those fresh ginger slices with a bit of white pepper and some extra lime juice will come close to mimicking the flavor.

10.11.2006

Retro Recipe: White Bean and Pork Chili

Ah, 1987.
I just ran through wikipedia looking for really memorable events . . . and big surprise, I don't actually remember really any of them. I was four, and Raffi was pretty cool stuff.
I didn't find anything much for 1983 (my actual birth year, that being the theme for this month's Retro Recipe Challenge), but a few years' leeway allowed me to find a recipe for White Bean and Pork Chili which fits in nicely with my personal current theme of using up things that are already in my kitchen. When I was four, I guarantee you I never would have eaten anything at all like this recipe, which --- eee-yew! -- has different kinds of foods mixed and touching each other. Not that I was a picky eater, but stews were pretty much just completely out of the question, and soup even was out of the question unless it was Campbell's. To my parents' chagrin, I refused to touch their homemade chicken noodle. This was probably because the different types of food were readily identifiable as being of vegetable, chicken, noodle, et cetera, whereas Campbell's not necessarily. I thought it would be nice to take a good fall-ish recipe like chili from that time to see how far I've come.

Turns out, my childhood instincts with this recipe were rather dead-on; the ingredients would be better separate than together. Not that it's bad, just not very interesting. In staying true to the retro, I resisted urges to doctor it up and play around with it (with exception to the bay leaf, which I added before I realized it didnt actually call for one, and the seasonings, which just went straight in the pot as there wasn't anything to deglaze). As is, it's a fairly mediocre affair, which led me to several conclusions . . . .One: it is really difficult to take an appetizing-looking photo of something like chili.
Two: At a 1/2 inch dice, the pork was cooked through before it had really even browned, resulting in slightly tough meat with not much meat flavor to it. This dish could be a contender if made with a more well-marbled, less lean bit like pork shoulder or boneless country ribs, cut in 1-2 inch chunks and dredged in seasoned flour before browned.
Three: There's not enough liquid. The one cup of broth called for was gone at the 1/2 hour mark, and after pouring in the rest of the can there was barely any at the end to coat all the beans. Another 1/2 cup at least of liquid - broth, wine, water even - plus the full can would be more on target.
Four: The meager seasonings get lost in here. Start off with the triple the chili powder and cumin, and don't bother enticing me in with the word 'sage' unless you mean it.
Five: Speaking of a lack of flavor, 2 cans of rinsed, drained beans added just before serving did nothing for me. Add them 30-40 minutes into the hour to allow them to break down and absorb a bit.
Six: Keebler TownHouse Cornbread crackers are awesome. They and monterey jack cheese saved the chili.

UPDATE: After massive amounts of seasonings and two days later, it's actually a pretty decent thing. I don't tend to use celery and carrot in chili, so it was a nice addition. The meat is a bit more tender now, but the flavor would still be improved with another cut. I recommend, if you can, making a day ahead to let it meld.

WHITE BEAN AND PORK CHILI
from Bon Appetit, June 1987

3 Tbsp olive oil
1 medium onion, chopped
~ 1 c chopped baby carrots
2 medium celery stalks, chopped
2 large garlic cloves, minced
1 pound pork loin, cut into 1/2 inch dice
1 tsp chili powder
1/2 tsp cumin
1/2 tsp dried oregano, crumbled
1/8 tsp sage
1 bay leaf
1 standard can beef broth
1 14 1/2-oz can peeled diced tomatoes (undrained)
2 15-oz cans cannellini beans, rinsed and drained

heat 2 Tbsp oil in heavy large saucepan over medium heat. Add onion, carrots, celery and garlic and cook until tender, about 10 minutes.
Meanwhile, heat remaining 1 Tbsp oil in heavy large skillet over high heat. Pat pork dry. Add the skillet, season with salt and pepper and cook until browned, stirring frequently, about 6 minutes (I don't know where they get that number).
Add pork to vegetables. Blend the seasonings and stir. Add the broth. Add tomatoes with liquid and bring to boil. Reduce heat, cover and simmer until pork is tender, stirring occasionally, about 1 hour.
Add beans to mixture and stir until heated through. Serve warm, topped with shredded cheese.


10.10.2006

Pantry Raid

One can of solid pack pumpkin: $1.29.
One quart of organic beef stock: $3.29 (and totally worth it, for its being the only low-salt, no-fat beef broth out there. Chicken seems to have the monopoly on the broth aisle . . . but I digress).
Package of roasted pumpkin seeds: $1.49.

Feeling virtuous for clearing out the cans of black beans in the pantry and not letting the half ham steak and red onion in the refrigerator go to waste: priceless.

I always feel like the state of my kitchen is stuck between the two extremes of what looks like no food or a heck of a lot of leftovers. I also feel that lately in a quest for diversity and entertaining meals, I’ve ignored the things that I have on hand. Not only is this wasteful and impractical, it means I have run out of room on the lower shelf of my pantry – the crucial one, as it’s about the only one I can reach without being on tiptoes. Time for a proper pantry raid. It’s kind of like a scrap Iron Chef on your own kitchen scavenger hunt – finding as much as you can in the kitchen already and buying the bare minimum.
Along the way I found a new favorite of the alcohol substitutions, which offers both useful other alcohol and non-alcoholic stand-ins for what isn’t in your pantry. I can’t say how close a mix of red wine and apple cider comes to sherry, but it worked for me.

BLACK BEAN PUMPKIN SOUP
adapted from Gourmet, November 1996

three 15 1/2 oz cans black beans
1 14 1/2 oz can diced tomatoes, well-drained
1/2 large red onion, cut in 1/8 inch dice
1 small yellow onion, cut in 1/8 inch dice
5 garlic cloves, minced or pressed
1 Tbsp cumin
scant 1/2 tsp salt
black pepper
1/2 stick (4 Tbsp) unsalted butter
4 c low-salt, fat-free beef stock
1 15 oz can solid pack pumpkin
1/3 c merlot plus 3+ Tbsp apple cider to equal 1/2 c liquid
8 oz ham steak, cut into 1/8-1/4 inch dice
2 Tbsp balsamic vinegar
1 Tbsp red wine vinegar
for garnish: sour cream, scallion, and roasted pumpkin seeds

Rinse and drain 2 cans of the black beans and place in a food processor with the drained tomatoes. Coarsely puree together. Rinse and drain the remaining can of black beans and mash slightly with an avocado masher or fork.
In a large heavy soup pot cook the onions, garlic, cumin, and salt and pepper in the butter over moderate heat, stirring, until the onion is softened and beginning to brown, about 4-5 minutes. Stir in the bean puree and mashed beans. Stir in the stock, pumpkin, and merlot/apple cider until combined. Simmer, uncovered, stirring occasionally, about 25 minutes or until thick enough to coat the back of a spoon.
Meanwhile, warm the ham briefly in a skillet over medium heat, about 2-3 minutes.
Before serving, add the ham and vinegars to the soup and simmer for another minute or so or until heated through.
Serve soup garnished with a dollop of sour cream, some chopped scallion and pumpkin seeds.

Pure Gold

Remember when I needed to use up eight egg whites?
That's because you need eight egg yolks to make Gold Cake.
Rich, vanilla-y, beautifully pale yellow, and makes even thin layers that go hand-in-hand with a dark chocolate frosting.

Happy birthday, baby - I love you.

GOLD CAKE
adapted from the all-new Joy of Cooking

2 1/2 c sifted cake flour
2 1/s tsp baking powder
1/4 tsp salt
12 Tbsp unsalted butter
1 1/4 c sugar
8 large egg yolks
2 tsp vanilla
1/2 lemon extract
3/4 c milk

Have all ingredients at room temperature. Preheat the oven to 375 F. Grease and flour the bottom and sides and three 9x2 round cake pans.
Sift together the cake flour, baking powder and salt three times.
Beat the butter on high until creamy, about 30 seconds. Gradually add the sugar and beat on high speed until
lightened in color and texture, about 3-4 minutes.
In another bowl, beat together the egg yolks and extracts on high speed until thick and pale yellow. Beat the egg mixture into the butter mixture.
Add the flour mixture in 3 parts, alternating with the milk in 2 parts, into the batter on low speed.
Divide the batter among the three prepared pans and spread evenly. Bake until a toothpick in the center comes out clean, about 20 minutes (check after about 15). Let cool in the pans on a rack for 10 minutes. Slide a thin knife around the cake to detach it from the pans. Let cool right side up on the racks, and cool completely before frosting.

notes: be sure to use whole milk, and watch the pans - because the layers are so thin, they bake quite quickly. I took mine out at 17 and I think I could've done with even less than that. Because of the thin layers, you want thinly spread frosting between them as well. If you go with homemade, you'll need about 2 1/2-3 cups; if you're using storebought, you'll need just over one tub.

10.04.2006

A Crack in My Shell

It is a completely novel thing for me to be thinking about eggs, and far more to be eating eggs, and beyond that even to be blogging eggs. Sure, they had their uses, in muffins and breading and brownies, but up until recently I had considered eating eggs on their own as pretty darn preposterous. Every Easter, I'd dye eggs with my sister, but never saw the point in having them as anything but decoration. I remember wanting to like eggs very much when I was a lot younger, but this was mostly due to the fact that we had some splendid little yellow duck soft-boiled egg holders, and the egg would sit in this hollow above their wings. I ruined several breakfasts for my mother by insisting on having eggs and then letting them sit there in the little ducks. In my defense . . . these were some really cute egg cups.
Recently, if you'll forgive the term, there have been cracks, little gaps of logic in my theory that I dislike eggs immensely. This started some weeks ago, when I had some eggs leftover from baking and in a spur of domesticity asked Rob if he wanted an omelet. He did, and this was working brilliantly until I realized I had no idea how one makes an omelet. Seriously. He took over, and I was so intrigued by the process that I stole bites of his. I kind of liked it. I've eaten two more since. It confuses me.
This week, I've been scouring over cookbooks trying to find an appealing recipe, as I knew I'd be coming into leftover egg whites shortly - but that post is for another day. Macaroons didn't seem to use quite enough and I didn't need more cookies, but I'm not used to thinking outside the box when it comes to eggs and was running out of ideas. Luckily, today's New York Times snagged my attention with a gruyere puff, quite conveniently also solving the problem of what to do with the other night's leftover gruyere.
The egg whites are more of a concession to the leftover business (you could use the original 3 whole ones it calls for) rather than healthfulness, and any inkling of that is cut short by the ridiculous amount of butter and a mountain of shredded cheese (I find this, in addition to tons of seasoning, is a very good remedy for reducing characteristic eggy taste). I don't think it's quite a puff per se anymore, which is always the difficult thing to know if it looks like it's supposed to when you make a recipe for the first time but alter the heck out of it and use a wider pan, but it has a yummy crisp exterior and a melting inside (it firms up a bit upon standing to cool for a few minutes).
You know what? It's eggs. And it tastes good. Who knows what's next?

EGG WHITE AND GRUYERE-CHEDDAR PUFF
adapted from the New York Times Dining, October 4, 2006

8 large egg whites
1/2 c 2% milk
1/2 c flour
1/2 tsp onion salt
lots of cracked black pepper
~ 1/2 tsp each onion powder and garlic powder
~ 1 tsp dried dill
1 c shredded gruyere cheese
1 c shredded sharp white cheddar
3 Tbsp unsalted butter

Preheat the oven to 400 F.
In a large bowl whisk together the egg whites, milk, flour, and seasonings. Whisk hard until there are no flour lumps remaining and the mixture is a bit foamy and smooth. Stir in the cheeses.
Melt the butter in a 9 or 10-inch ovenproof skillet over low heat. Swirl to coat all sides of the pan thoroughly. Pour in the batter and transfer pan to the oven.
Bake for about 30 minutes until a bit puffed and dark golden on top. Let cool just a few minutes in the pan before loosening around the edges with a plastic spatula. Carefully slide out onto a plate and serve hot or warm.

10.02.2006

World Bread Day: Herb Flatbread with Ham, Red Onion and Gruyere

Thanks to Zorra for blogging World Bread Day.

I've been wanting to make a flatbread concoction since Rob found this frozen one at Trader Joe's a month or two back. Flat like a tortilla flat, it was as thin and crispy as matzo, had ham and red onion and was positively smothered in gruyere cheese.
The flatbread recipe itself comes from a NYTimes Dining recipe, originally intended for Stilton-Tomato Pizza. I stole it for this on the advantages that is both a yeast bread and still relatively quick. Plus, no pizza stone required! If you knead the dough in a stand mixer, the thing practically makes itself.
The end result is somewhere between TJ's superthin crisp and what I think of when I think of pizza: the bread doesn't rise all that much, and the edges and bottom have a satisfying crunch that is still decidedly bread and not matzo-like. It's not at all doughy, and entirely scrumptious.


HERB FLATBREAD WITH HAM, RED ONION AND GRUYERE

adapted from the New York Times Dining, July 12, 2006

flatbread
1 packet active dry yeast
1 c water, divided
1 tsp sugar
3/4 tsp sea salt
ground black pepper
1 tsp dried Italian seasoning or mixed dried herbs (recommended: thyme)
2 Tbsp olive oil
3 c flour

2 Tbsp olive oil
1 1/2 red onions, sliced in half moons
2 Tbsp wine or chicken broth
1 tsp dried parsley
~ 6 oz ham steak, cut 1/4" thick and then in matchsticks about a 1/2" long
2 1/2 c shredded gruyere cheese
~ 1/2 c shredded fresh mozzarella

Mix the yeast and sugar with 1/4 c of warm water (110 degrees F) in large bowl. Set aside five minutes until foamy. Stir in 2 Tbsp olive oil, the salt, pepper to taste, and the herbs. Add 3/4 c water and mix.
Mix in 2 c flour. Continue adding flour until dough can be gathered together. Knead with floured hands in the bowl or use the dough hook on a stand mixer (be careful not to overmix if using the mixer), adding more flour as needed, until dough is smooth, elastic, and just a bit sticky. Put dough in a bowl brushed with oil, cover with a clean towel and set aside until doubled in volume, about 1 hour.
Oil or spray with nonstick cook spray an 11x17 jellyroll pan or rimmed baking pan.
While the dough rises, heat the other 2 Tbsp olive oil in a large skillet over medium-high heat. Add the onions and cook until softened a bit but not browned. Add the wine or broth, sprinkle the parsley and some salt and pepper over to taste, and briefly increase the heat to high. Cook, stirring, until the onions have absorbed some of the liquid and softened a bit more. Remove from heat.
In a separate smaller skillet cook the ham matchsticks over medium-heat just briefly until they are fragrant and warm. Do not brown.
Preheat the oven to 500 F with the rack in the lowest position. Punch the dough down. Roll and stretch the dough on a lightly floured board (like the back of a large cutting board) to fit pan, leaving the border just a smidgen thicker than the middle. Put dough in the oiled pan.
Mix the cheeses together and spread a thin layer, about a cup or so, over the dough, leaving a border bare. Spoon and spread on the red onions, then sprinkle the ham over. Top with the remaining cheese. Bake about 20 minutes or until crust is brown.